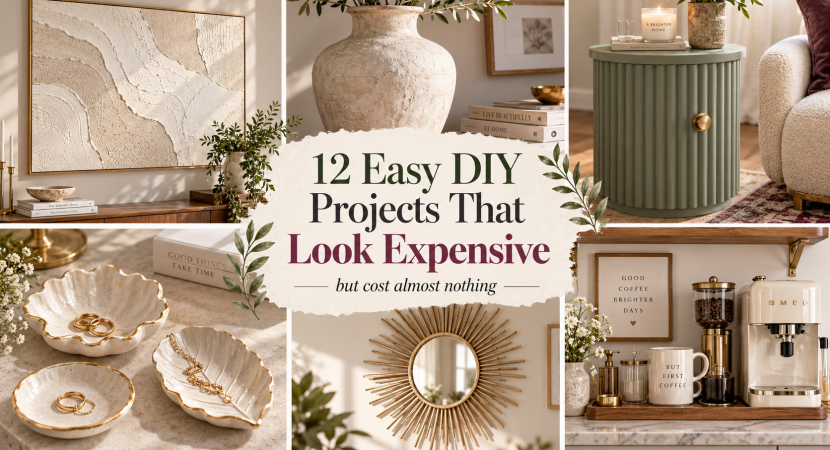
12 Easy DIY Projects That Look Expensive but Cost Almost Nothing
You know that moment when you spot a beautiful vase, side table, or piece of wall art online, fall in love with it, and then see the price?
Suddenly, it isn’t quite as beautiful.
Fortunately, creating a stylish home doesn’t always require designer furniture or a generous decorating budget. Some of the most convincing high-end looks can be recreated with inexpensive materials, thrifted pieces, leftover paint, basic craft supplies, and a free afternoon.
The secret isn’t necessarily spending more. It’s choosing the right finish, keeping the design simple, and paying attention to the little details that make inexpensive decor look intentional.
These easy DIY projects that look expensive are designed for exactly that. Most can be adapted using materials you already own, and you don’t need professional crafting skills to get a polished result.
If you enjoyed our recent guide to 15 viral DIY home decor ideas taking over Pinterest in 2026, think of this as the practical follow-up: projects you can actually make without giving your bank account a makeover too.
Why Do Some DIY Projects Look Cheap While Others Look Expensive?
Before getting into the projects, there’s one useful thing to understand.
Expensive-looking decor usually isn’t complicated.
In fact, high-end interiors often rely on restrained colors, natural-looking textures, larger statement pieces, and carefully chosen finishes rather than dozens of decorative details.
When you’re working on DIY home decor on a budget, these small choices make a big difference:
- Choose two or three complementary colors instead of using everything at once.
- Matte and satin finishes usually look more sophisticated than very shiny craft paint.
- Natural-looking materials such as wood, linen, clay, stone, rope, and brass tend to age well.
- One larger decorative piece often looks more expensive than several tiny ones.
- Give paint and glue enough time to dry properly.
- Sand rough edges rather than leaving them unfinished.
- Replace cheap-looking hardware when possible.
A five-dollar project can look surprisingly polished when the finish is right.
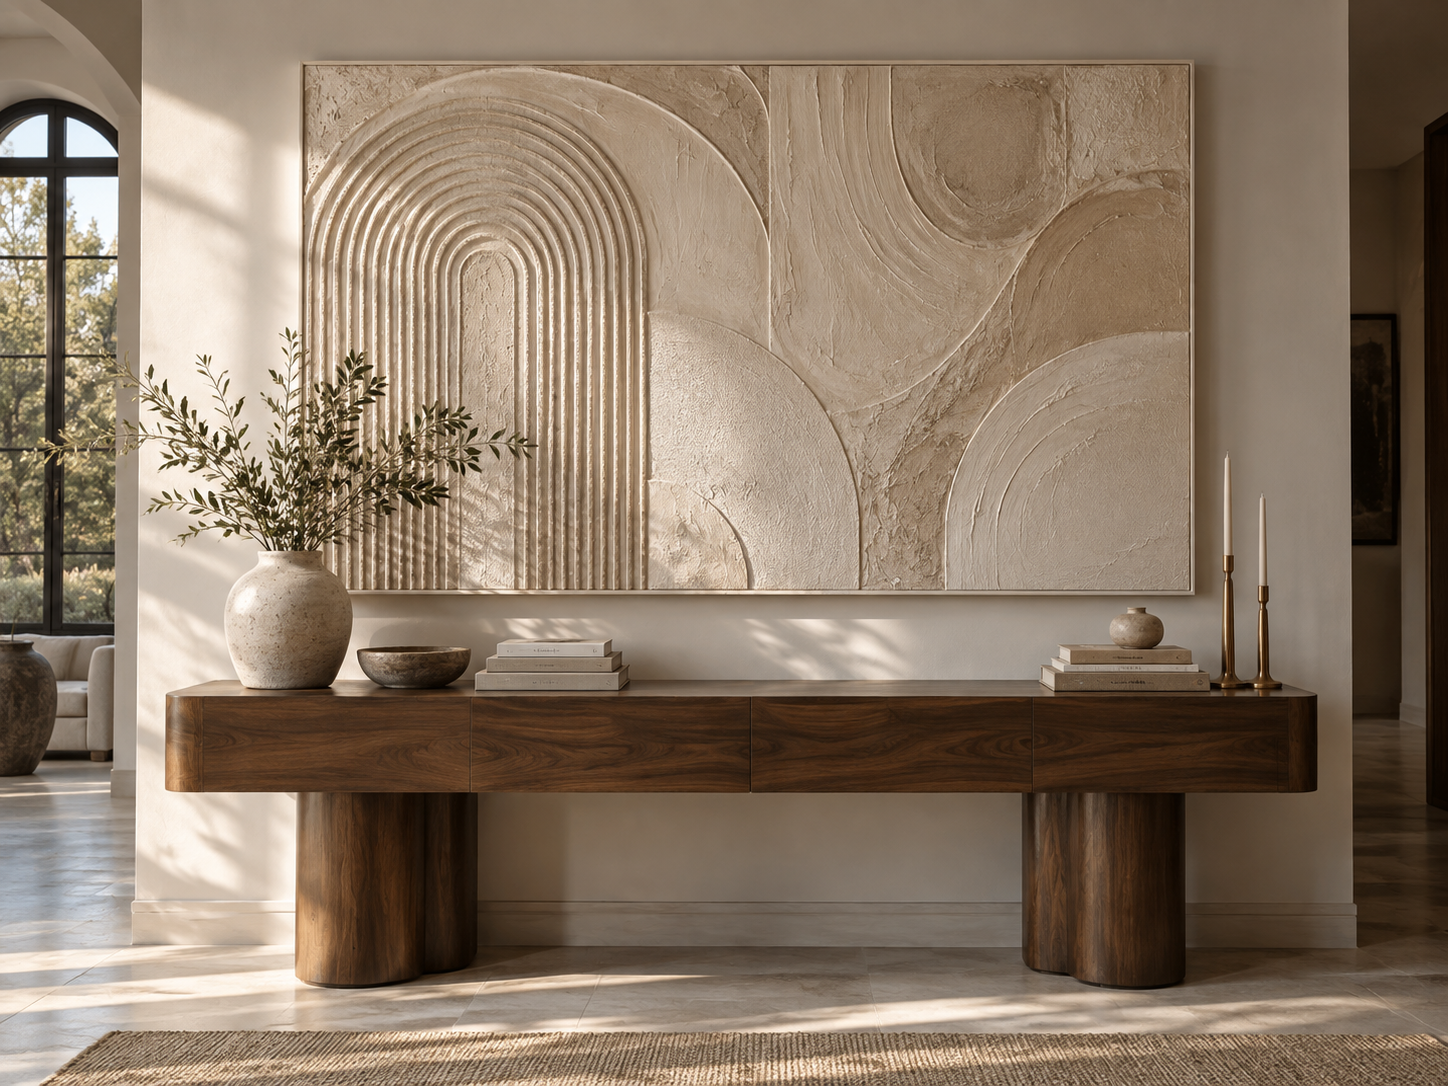
1. DIY Textured Wall Art
Oversized textured art can cost hundreds of dollars, which is slightly painful when you realize the design may consist of nothing more than a few raised curves on a neutral background.
Thankfully, it’s also one of the easiest looks to recreate.
What you’ll need
- An inexpensive stretched canvas or old framed artwork
- Joint compound, lightweight filler, or modeling paste
- Putty knife
- Old credit card or scraper
- Matte paint
- Paintbrush
How to make it look high-end
Spread a thin layer of compound over the canvas. Before it dries, use your scraper to form arches, waves, sweeping lines, or organic shapes.
Don’t overwork it.
A few confident shapes usually look better than filling every inch of the canvas with texture.
Once it dries completely, paint everything in one soft shade such as warm white, stone, taupe, muted sage, or clay.
For an especially polished look, use a large canvas and keep the color palette understated.
If you’d like more inexpensive artwork ideas, take a look at our 10 creative DIY wall art ideas for your workplace. The ideas can easily be adapted for bedrooms, living rooms, or home offices as well. 10 Creative DIY Wall Art Ideas
Budget-saving tip: Reuse an old canvas you no longer like rather than buying a new one.
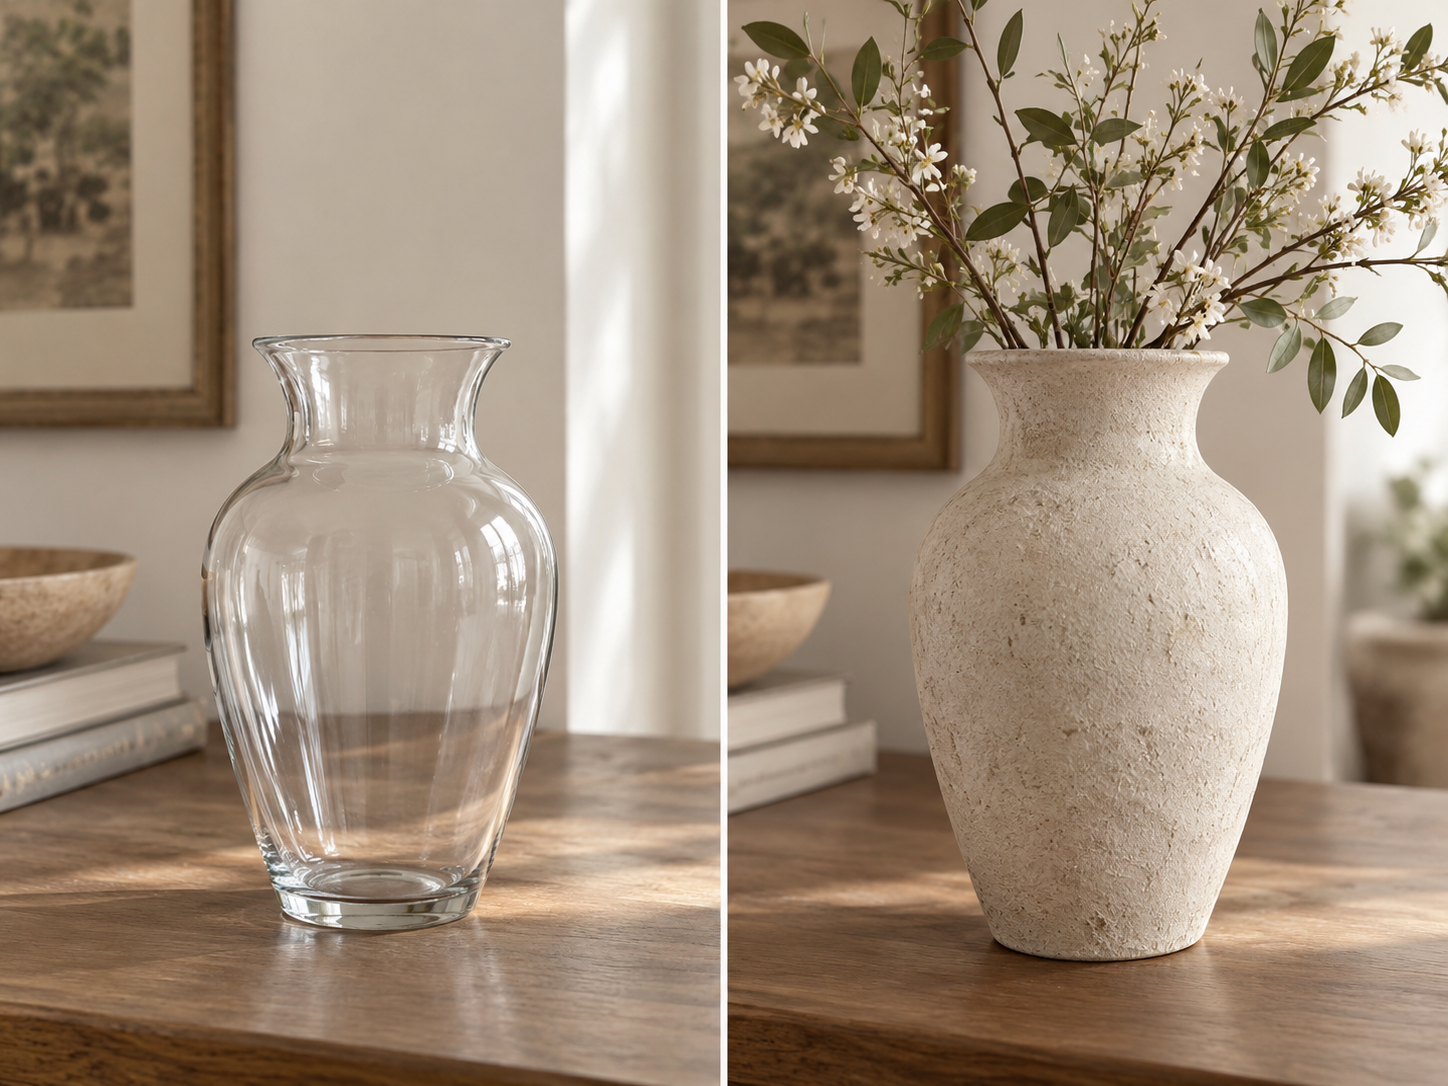
2. Turn a Cheap Vase Into Faux Pottery
Those beautifully imperfect ceramic vases you see in interior-design photos can be surprisingly expensive.
A glass vase from a thrift store can give you almost the same effect.
What you’ll need
- Old glass or ceramic vase
- Acrylic or wall paint
- Baking soda
- Paintbrush
- Optional sandpaper
Mix a small amount of baking soda into your paint until the mixture becomes slightly textured.
Paint the vase with two or three thin coats.
The baking soda removes the glossy appearance and gives the surface a more ceramic, stone-like finish.
Try warm white, sand, charcoal, olive, terracotta, or deep brown.
Make it look even better
Paint two or three mismatched thrift-store vases in closely related shades and display them together.
The shapes don’t need to match.
In fact, different silhouettes make the group look more collected and less like something purchased as a matching set.
Add dried branches or simple greenery and you’ve got decor that looks far more expensive than it actually was.
3. Create a Designer-Look Fabric Wall Frame
Good fabric is art waiting to happen.
If you have a beautiful scarf, leftover upholstery fabric, embroidered textile, vintage handkerchief, or patterned linen tucked away in a cupboard, don’t leave it there.
Frame it.
What you’ll need
- Fabric
- Old picture frame
- Cardboard or foam board
- Double-sided tape or fabric-safe adhesive
Iron the fabric first.
Wrap it tightly around a piece of board cut to fit your frame, secure the edges at the back, and place it inside the frame.
That’s it.
Which fabrics work best?
Look for:
- Botanical prints
- Block prints
- Embroidery
- Geometric patterns
- Vintage florals
- Linen
- Woven textiles
- Subtle metallic thread
A larger frame makes this project look particularly luxurious.
You can also create a set of three smaller coordinating fabric frames.
This is one of the best cheap DIY home decor ideas because you may already have everything you need.
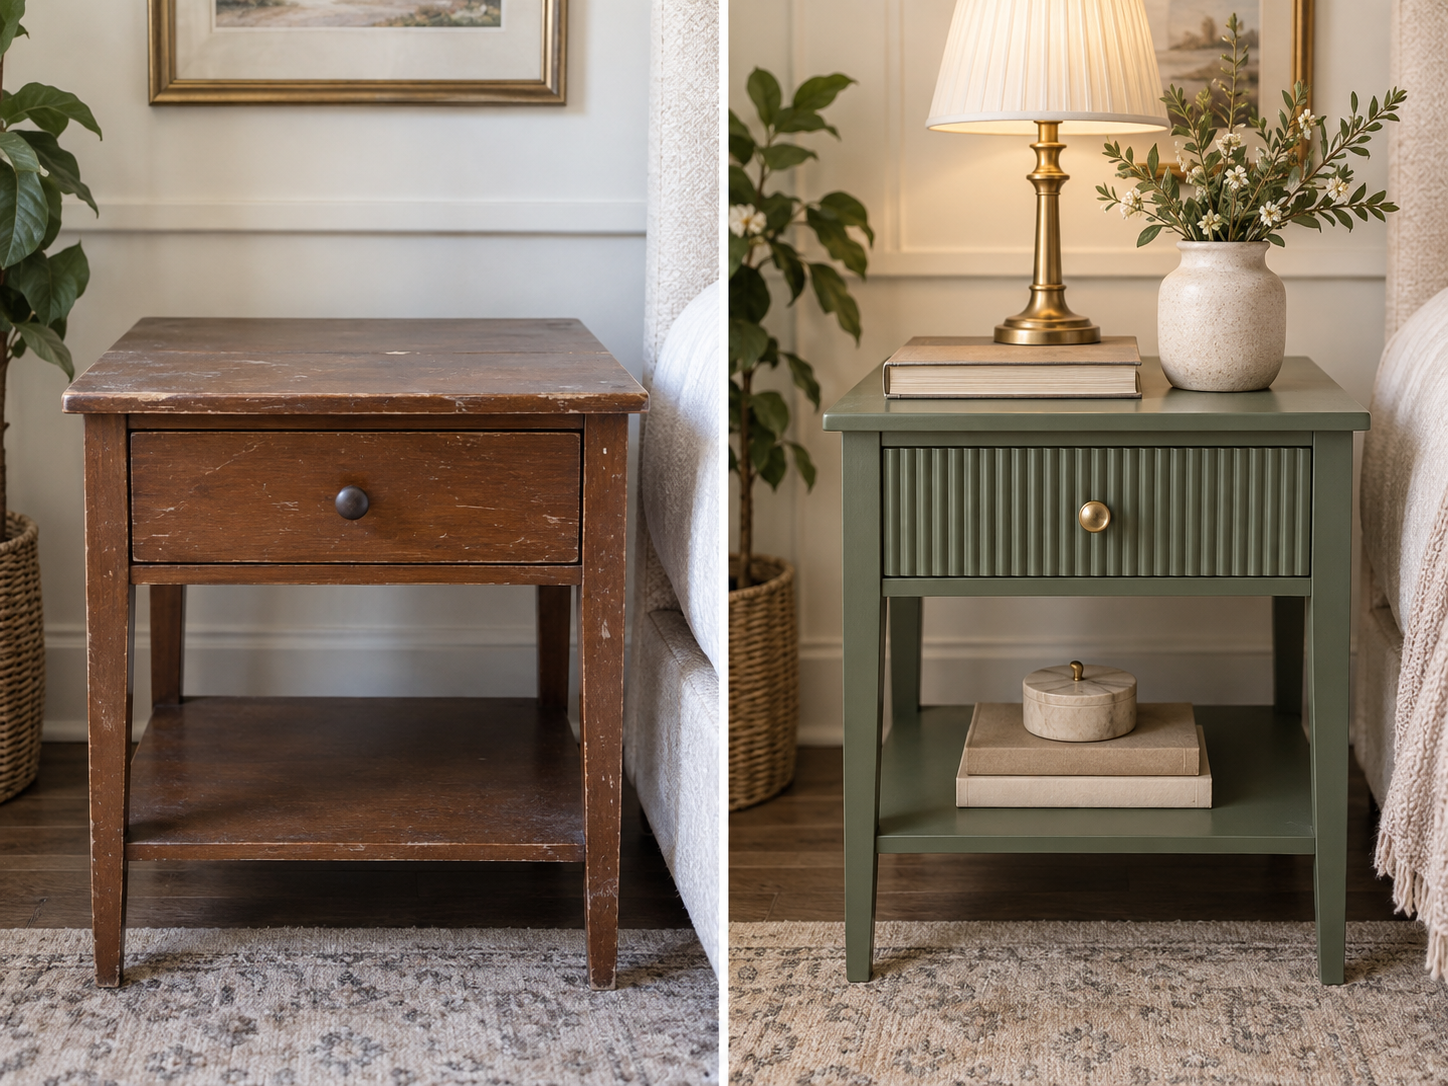
4. Give an Old Side Table a Fluted Makeover
Fluted furniture has been everywhere in high-end interiors, but you don’t have to buy a brand-new cabinet to get the look.
A basic nightstand or side table can be transformed with thin wooden trim.
What you’ll need
- Old table or cabinet
- Half-round wooden molding or narrow wooden dowels
- Strong wood adhesive
- Saw or cutting tool suitable for the material
- Sandpaper
- Paint
- New hardware
Cut your trim into equal lengths and glue the pieces vertically across the drawer or cabinet front.
Once everything is secure, lightly sand and paint the whole piece in one color.
Try:
- Deep green
- Charcoal
- Warm beige
- Cream
- Plum
- Dusty blue
Finish with a simple brass or matte-black handle.
The detail that changes everything
Replace the old hardware.
A small brass knob or streamlined handle can make inexpensive furniture look dramatically more polished.
If you’re planning a bigger storage refresh, our closet makeover guide has more ideas for improving existing spaces rather than replacing everything. The Most Effective Method for Closet Makeover
5. Make a Faux Stone Decorative Bowl
Large stone bowls look beautiful on coffee tables and console tables.
They’re also surprisingly easy to imitate.
What you’ll need
- Old plastic, metal, wooden, or ceramic bowl
- Primer suitable for the surface
- Textured paint mixture
- Sponge
- Matte sealer
Start with an inexpensive bowl that has a good shape.
The shape matters more than the original color.
Apply primer, then layer two or three slightly different neutral shades using a sponge.
Instead of painting perfect sections, dab the colors together irregularly.
Soft variations in cream, beige, gray, brown, and charcoal can create a convincing stone effect.
Styling tip
Don’t fill the bowl with ten different objects.
Try:
- A few decorative beads
- Pinecones
- Dried seed pods
- One sculptural object
- Nothing at all
Empty decorative bowls often look more sophisticated than overcrowded ones.
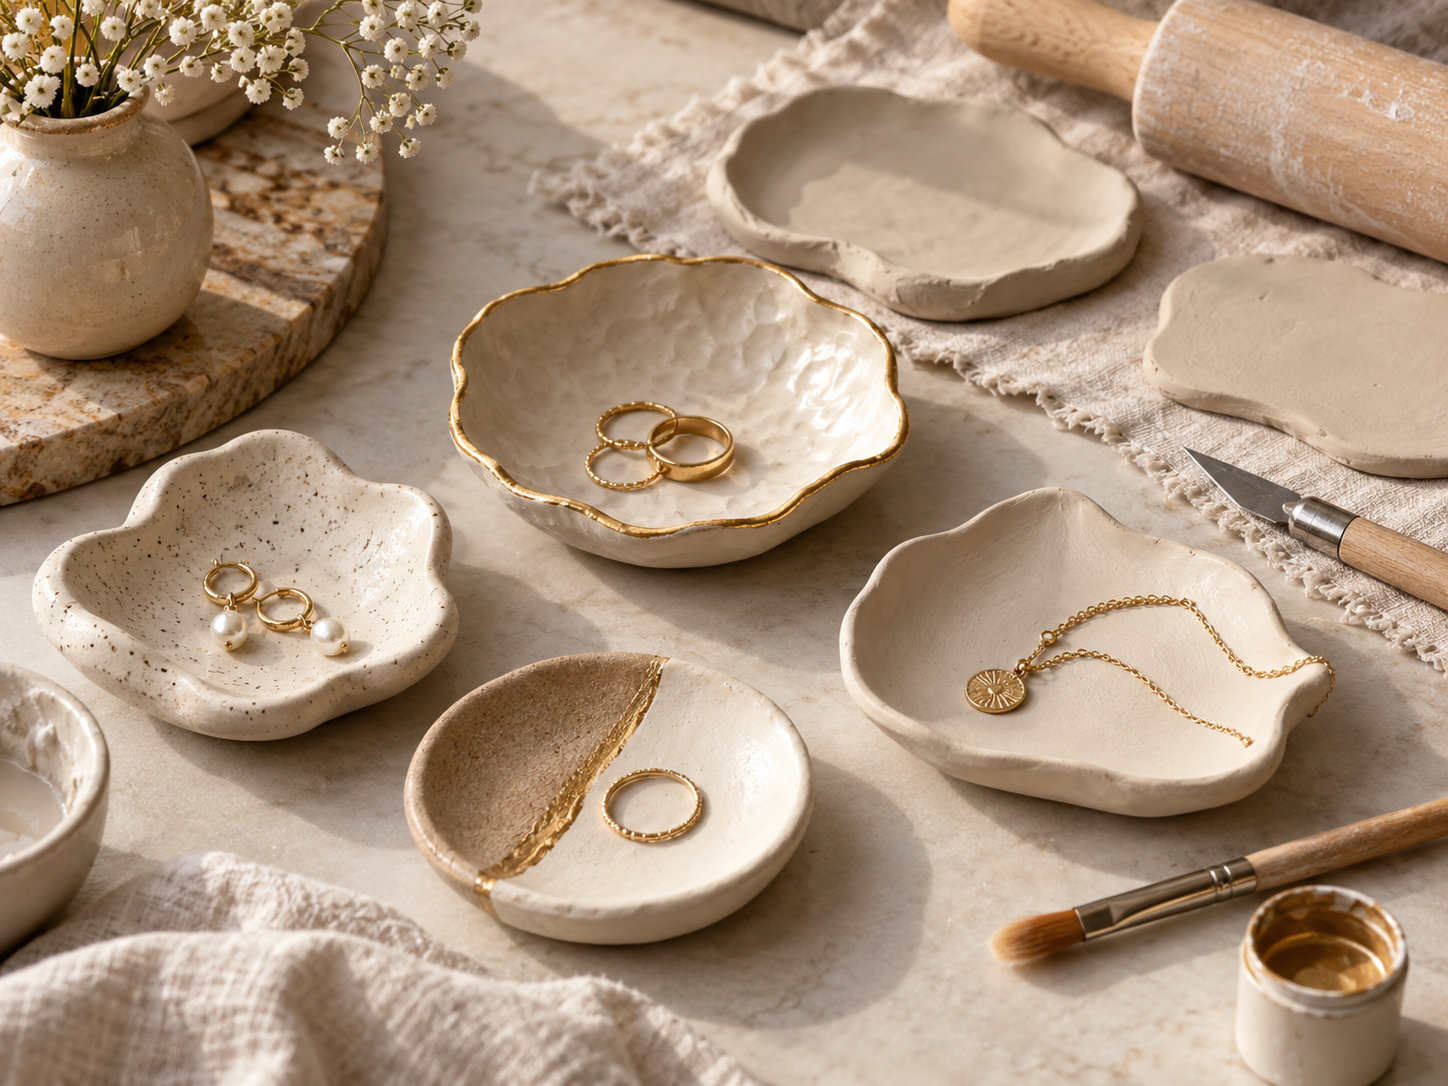
6. Make Air-Dry Clay Trinket Dishes
Air-dry clay is inexpensive, beginner-friendly, and one of the easiest ways to create decor that feels handmade rather than mass-produced.
It’s also very current. Pinterest’s 2026 hobby data shows strong interest in beginner-friendly clay projects and handmade crafts, which makes this a particularly timely DIY to try. Pinterest 2026 Hobbies Trend Report
What you’ll need
- Air-dry clay
- Rolling pin
- Small bowl or plate to use as a guide
- Craft knife
- Fine sandpaper
- Acrylic paint
- Clear sealer
Roll out the clay and cut an organic shape rather than trying to make it perfectly circular.
Turn the edges gently upward to create a shallow dish.
Once dry, sand any rough areas.
Paint it in one solid color or keep most of the clay natural and add a thin metallic-gold detail around the rim.
Use the finished dishes for
- Rings
- Earrings
- Keys
- Paper clips
- Hair accessories
- Small keepsakes
Slight imperfections actually improve this project. Handmade clay shouldn’t look factory-perfect.
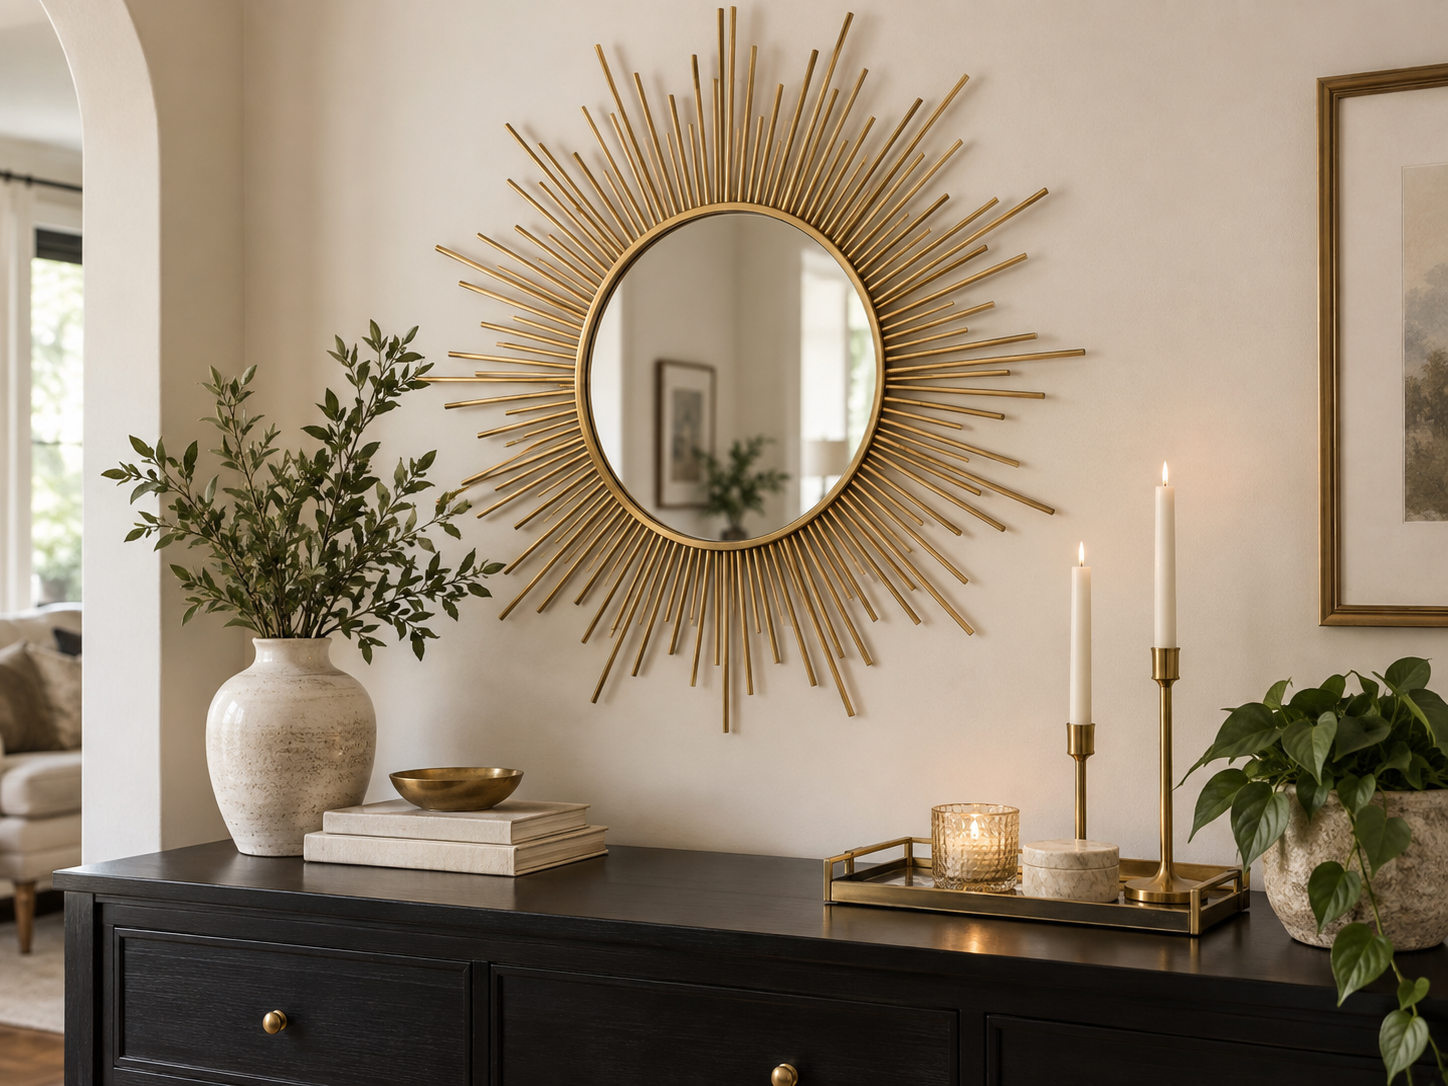
7. Create a DIY Sunburst Mirror
A dramatic mirror can transform an empty wall, but statement mirrors aren’t always budget-friendly.
The classic sunburst design is surprisingly simple to recreate.
What you’ll need
- Small round mirror
- Wooden dowels, bamboo skewers, or lightweight craft sticks
- Strong adhesive
- Gold, brass, black, or bronze spray paint
- Hanging hardware
Arrange the sticks around the mirror before gluing anything.
Alternate lengths to create a more interesting pattern.
Once you’re happy with the layout, secure the pieces and paint the finished frame.
Why this project works
Metallic finishes instantly create visual impact, but restraint matters.
Antique gold or brushed brass tends to look more sophisticated than extremely shiny yellow gold.
This DIY also works beautifully with the Neo Deco direction we explored in our guide to viral Pinterest home decor trends for 2026. 15 Viral DIY Home Decor Ideas Taking Over Pinterest in 2026
8. Upgrade a Plain Lampshade With Fabric
Lighting has a huge effect on how expensive a room feels.
Fortunately, you don’t need to replace the entire lamp.
Sometimes the shade is the only thing holding it back.
What you’ll need
- Plain lampshade
- Lightweight fabric
- Fabric adhesive
- Scissors
- Optional ribbon or trim
Choose fabric that works with the shape of the lamp.
A small floral or geometric pattern works well on traditional shades, while textured linen gives a cleaner contemporary look.
Cut the fabric with enough allowance to wrap around the edges neatly.
Secure everything carefully so there are no visible blobs of glue or uneven folds.
Want a more dramatic look?
Add:
- Pleats
- Contrast edging
- Scalloped trim
- Fringe
- Narrow velvet ribbon
A custom-looking lampshade makes even an inexpensive lamp feel intentional.
Safety note: Use materials suitable for lampshades, keep decorative materials away from the bulb, and follow the shade manufacturer’s heat-safety guidance. LED bulbs are generally preferable because they generate much less heat than traditional incandescent bulbs.
9. Make a Floating Picture Ledge
Gallery walls are beautiful, but constantly measuring and rehanging frames isn’t everyone’s idea of a relaxing weekend.
A picture ledge gives you more flexibility.
What you’ll need
- Narrow timber boards
- Screws
- Wall anchors suitable for your wall
- Wood glue
- Paint or stain
- Basic tools
Build or purchase simple narrow ledges and paint them the same color as the wall for a built-in appearance.
Then layer artwork of different sizes rather than lining everything up evenly.
Try mixing:
- Framed art
- Photographs
- Small mirrors
- Postcards
- Botanical illustrations
- Tiny sculptures
- Books
The beauty of a picture ledge is that you can rearrange everything whenever you get bored without creating another collection of holes in the wall.
For a softer handmade alternative, you can also try our DIY wall hanging macramé project. DIY Wall Hanging Macramé
10. Paint Old Furniture and Add Brass Hardware
Not every furniture makeover needs an elaborate technique.
Sometimes paint and new handles are enough.
Look at the shape of your existing furniture rather than its finish.
A scratched wooden nightstand with good proportions may have far more potential than a cheap new piece.
How to get a professional-looking result
- Remove the hardware.
- Clean the furniture thoroughly.
- Repair obvious damage.
- Lightly sand where required.
- Use the correct primer for the surface.
- Apply thin, even coats of furniture-appropriate paint.
- Allow proper drying time.
- Add new hardware only after the finish has cured.
Deep green with brass hardware looks particularly elegant, but warm white, navy, black, plum, and muted blue can work just as well.
Don’t skip preparation
The fastest way to make a DIY furniture project look cheap is rushing the preparation.
Paint cannot hide dirt, peeling finishes, or damaged surfaces forever.
Taking an extra hour at the beginning usually saves you from having to redo the project later.
11. Create an Affordable Home Coffee Station
A home coffee bar sounds like the kind of thing that requires an enormous kitchen.
It doesn’t.
You can build a stylish coffee station in one small section of countertop.
Start with what you already use
Gather:
- Coffee machine or kettle
- Favorite mugs
- Coffee or tea
- Sugar
- Syrups
- Spoons
- Small tray
Then decant frequently used ingredients into matching jars.
A wooden tray helps visually group everything together and immediately makes the counter look more organized.
Add one small plant or framed print.
That’s enough.
If your kitchen itself needs a refresh, our guide to modifying a kitchen countertop on a budget includes additional ways to improve the space without committing to a full renovation. Modifying Kitchen Countertop on a Budget
Current design coverage also shows kitchens becoming warmer and more personal, with freestanding pieces, framed art, softer lighting, and lived-in details gaining attention rather than purely clinical built-in spaces.
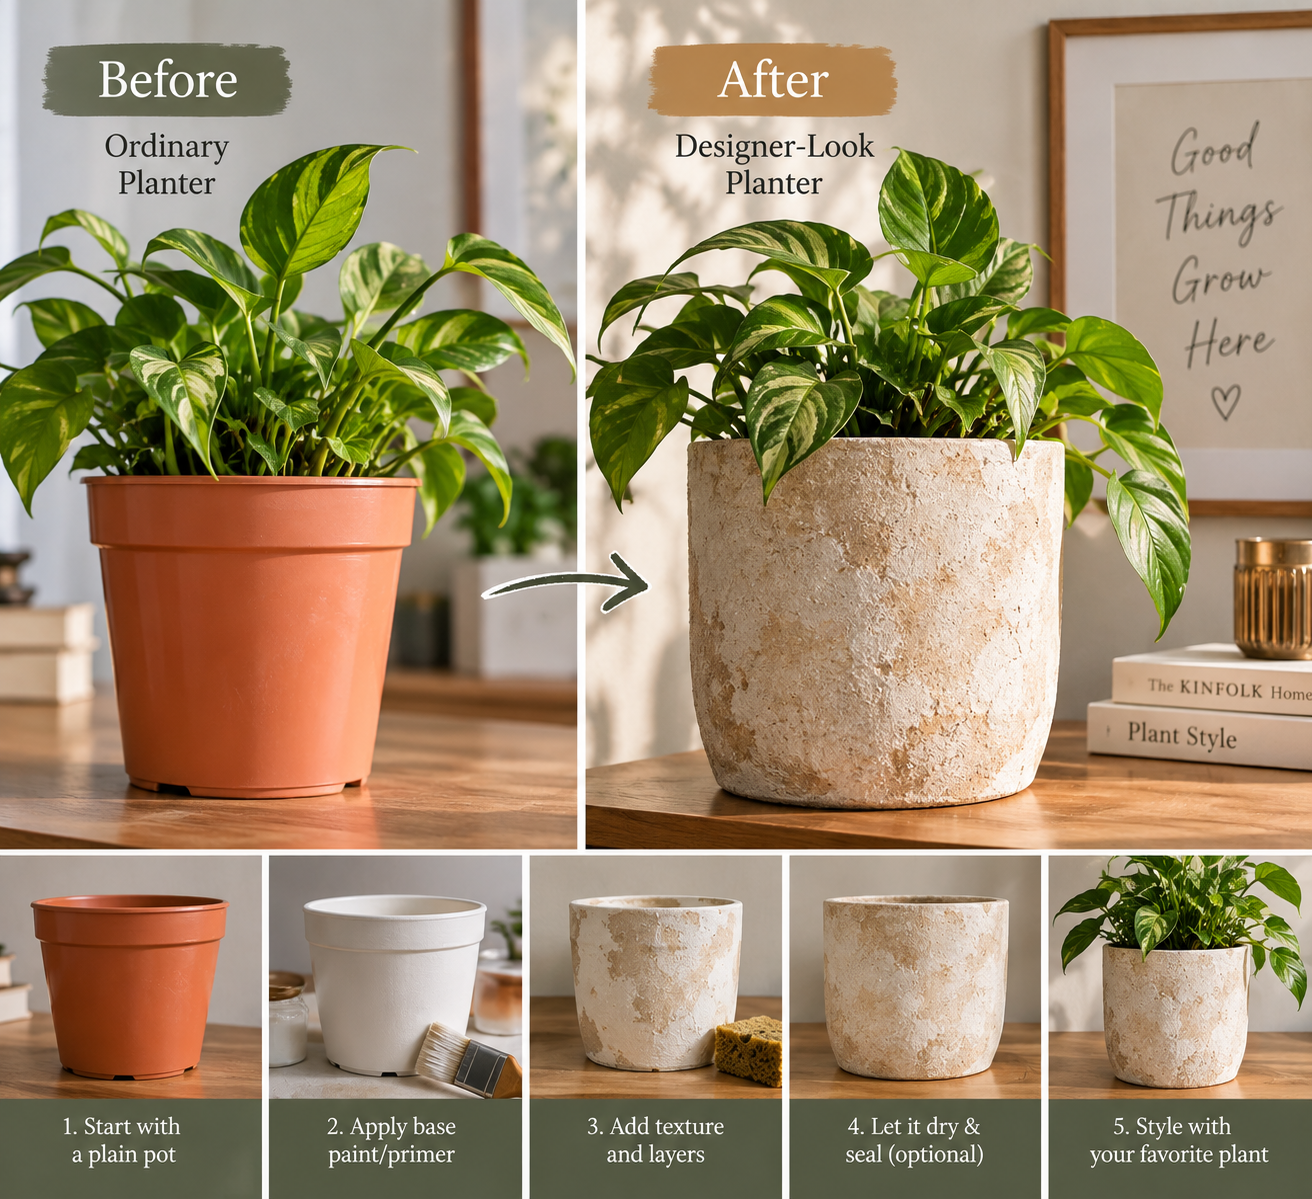
12. Turn an Ordinary Planter Into a Designer-Look Piece
Large decorative planters can cost more than the plant inside them.
Fortunately, basic pots are easy to upgrade.
Option 1: Textured paint
Mix a small amount of baking soda or fine texture medium into paint and apply it to a plain pot.
Use two related shades for a handmade stone effect.
Option 2: Limewash-inspired finish
Layer watered-down neutral paint unevenly with a wide brush.
The subtle variation gives the planter an aged plaster look.
Option 3: Rope detail
Wrap a portion of the planter with natural rope or jute for extra texture.
Keep the design restrained rather than covering every inch.
Once finished, add a leafy plant and place it somewhere the silhouette can stand out.
If you’re running out of floor space, our DIY wall hanging plants tutorial offers another inexpensive way to add greenery vertically. DIY Wall Hanging Plants
How to Make Cheap DIY Decor Look More Expensive
You can follow the perfect tutorial and still end up with something that looks homemade in the wrong way.
Usually, the problem isn’t the project.
It’s the finish.
Use fewer colors
A limited palette creates visual consistency.
For example:
- Cream + walnut + brass
- Sage + warm white + wood
- Plum + beige + antique gold
- Black + natural wood + linen
You don’t need every project in the room to match, but they should feel as though they belong together.
Avoid too many decorative extras
When in doubt, remove something.
Extra beads, glitter, ribbons, words, decals, and embellishments can quickly make a sophisticated project feel busy.
Choose the right scale
A tiny piece of artwork floating in the middle of a large wall usually feels inexpensive.
One larger piece — even if it cost very little to make — tends to look more intentional.
Pay attention to hardware
Handles, knobs, hooks, hinges, and feet are like jewelry for furniture.
Changing one small piece of hardware can completely alter how an item reads.
Style your DIY once it’s finished
Presentation matters.
A handmade vase sitting alone on a cluttered counter may disappear.
The same vase on a clean console beside two books and a small lamp suddenly looks like part of an interior-design plan.
Which DIY Projects Are Best for Beginners?
If you’re new to DIY, don’t begin by dismantling your kitchen cabinets.
Start with something forgiving.
| Project | Difficulty | Typical Budget | Time Needed |
|---|---|---|---|
| Faux pottery vase | Very easy | Very low | 1–2 hours + drying |
| Fabric wall frame | Very easy | Very low | Under 1 hour |
| Air-dry clay dish | Easy | Low | 1 hour + drying |
| Textured wall art | Easy | Low | 1–2 hours + drying |
| Planter makeover | Easy | Low | 1–2 hours |
| Coffee station | Very easy | Low | Under 1 hour |
| Lampshade makeover | Easy | Low | 1–2 hours |
| Sunburst mirror | Easy | Low | 1–2 hours |
| Picture ledge | Medium | Low | 2–3 hours |
| Furniture repaint | Medium | Low–medium | Weekend project |
| Fluted side table | Medium | Low–medium | Weekend project |
| Faux stone bowl | Easy | Very low | 1–2 hours + drying |
These times and costs are deliberately broad because prices and drying times vary by materials, location, and what you already own.
What Should You Thrift Instead of Buying New?
Thrift stores, flea markets, Facebook Marketplace, garage sales, and even your own storage cupboard can be gold mines for inexpensive DIY projects.
Look past ugly finishes and focus on shape.
Good things to rescue include:
- Wooden frames
- Mirrors
- Glass vases
- Ceramic bowls
- Nightstands
- Side tables
- Lamps
- Planters
- Wooden trays
- Picture frames
- Small cabinets
- Stools
A dated color can be changed.
A badly proportioned piece is harder to fix.
A Simple Rule Before Starting Any Budget DIY Project
Ask yourself:
Am I actually saving money?
DIY is fun, but a supposedly inexpensive project stops being inexpensive if you need to buy twelve specialized tools you’ll never use again.
Before starting:
- Check what you already own.
- Borrow tools when practical.
- Buy materials in quantities you’ll actually use.
- Save offcuts and leftover paint for future projects.
- Thrift the base item whenever possible.
- Compare the total DIY cost with the cost of buying the finished item.
Sometimes making it yourself wins easily.
Sometimes the sensible DIY choice is walking away.
And that’s okay.
Final Thoughts
The best DIY projects that look expensive aren’t the ones that fool everyone into thinking you spent a fortune.
They’re the ones that make your home feel more considered without requiring you to spend one.
An old vase can become pottery-style decor.
A scratched nightstand can become a statement piece.
Leftover fabric can become wall art.
An inexpensive mirror can become the focal point of a room.
None of these projects requires a massive renovation budget, and most don’t require advanced DIY skills either.
Start with one project.
Use materials you already have where possible.
Take your time with the finish.
And remember that expensive-looking interiors rarely come from filling a room with expensive things.
They come from making thoughtful choices.
Frequently Asked Questions
What are the easiest DIY projects that look expensive?
Some of the easiest options are faux pottery vases, textured wall art, framed fabric, air-dry clay dishes, decorative planter makeovers, and small coffee stations. These require relatively few tools and can often be completed using inexpensive or repurposed materials.
How can I make cheap DIY home decor look high-end?
Keep the color palette simple, use matte or natural-looking finishes, avoid excessive embellishment, choose appropriately scaled pieces, and pay close attention to details such as hardware, edges, and styling.
What DIY decor can I make with things I already have?
Old vases, bowls, picture frames, fabric, furniture, glass jars, planters, mirrors, and leftover paint can all be repurposed into new home decor.
Is DIY home decor actually cheaper than buying decor?
Often, yes — especially when you reuse materials or update items you already own. However, a project may not save money if it requires several new tools or specialist materials. Compare the total cost before starting.
What inexpensive DIY project makes the biggest difference to a room?
Large wall art, an updated furniture piece, a statement mirror, improved lighting, or a refreshed focal wall usually creates more visual impact than several small decorative objects.
What colors make DIY decor look expensive?
There isn’t one magic color, but warm whites, muted greens, deep blue, plum, charcoal, natural wood tones, and restrained metallic accents such as brass tend to work well in sophisticated interiors.


Reply